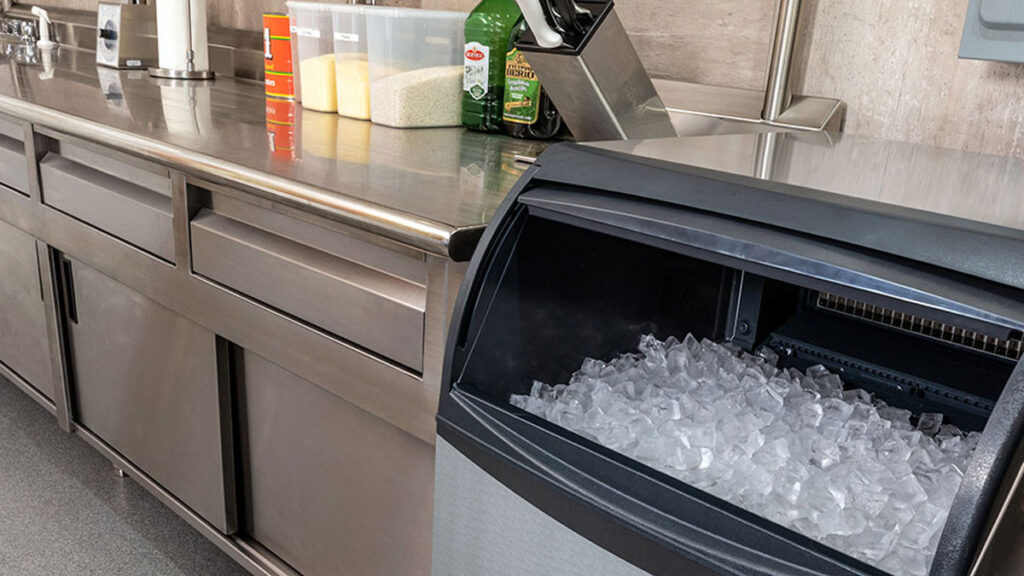
Commercial ice machines are the hidden heroes of the beverage and foodservice sectors, ensuring that drinks are kept at the proper temperature for flavor and safety. However, when it comes to cleaning, this piece of equipment is frequently overlooked, enabling deposits such as lime scale and mold to form, potentially contaminating ice and putting consumers at danger of disease. Because ice is classified a food by the FDA, it is critical to follow legal regulations by cleaning and disinfecting all components on a regular basis. Do you know how to keep an ice machine clean? Follow the step-by-step procedures below to ensure your facility’s ice production and safety.
What you will need
- Personal Protective Equipment (PPE) – such as rubber gloves and protective safety glasses – is required to clean an ice machine.
- Stainless steel wool or synthetic scrub pad
- Nyco® N601+ Sanitizer Nyco® Ice Machine Cleaner Nyco® Coil Cleaner
- Fresh water bucket
- Clean cloths/paper towels
- Non-abrasive sponge pads
How to Clean an Ice Maker
The maintenance needs for ice machines vary depending on the vendor, however most ice machines follow a similar basic pattern. Please consult your machine’s manual for the proper process, however below are some general cleaning procedures for most ice producers.
- Remove ice from the bin or dispenser as follows: During the cleaning and sanitizing procedures, all ice must be removed. This can be performed using one of two approaches. You can either hit the power button at the conclusion of the harvest cycle after the ice has fallen from the evaporators, or you can press the power switch and let the ice melt fully.
- When you press the “clean” or “wash” button, water will flow through the water dump valve and into the drain. Wait until the water trough filled and the display shows that chemicals should be added. This usually takes at least one minute.
- Cleaner should be added: Use the required amount of ice machine cleanser according to your instructions.
- Wait till the clean cycle is finished: Typically, the cleaning cycle lasts at least 20 minutes. When you’re finished, turn off the ice machine. It’s also vital to turn off the dispenser’s electricity if possible.
- Remove internal components: Remove any internal components from your ice machine before cleaning. Refer to your machine’s manual for safe and correct removal. Continue to the following step once all pieces have been removed.
- Cleansing solution: Dilute your cleaning solution mixture with lukewarm water. For an adequate amount of solution, consult your machine’s handbook. 1 gallon of water to 16 ounces of cleaner is a common water-to-cleaner ratio. You may need to apply extra cleaning depending on the quantity of mineral buildup.
- Clean all components and pieces that have been removed: Use half of the water and cleaner combination to clean all components and parts that have been removed. When most solutions come into contact with lime, scale, or mineral deposits, they begin to froth. Once the foaming has stopped, thoroughly clean all components with a soft-bristle nylon brush, sponge, or cloth, and then rinse with clean water.
- Use the second half of the water and cleaner combination to clean all foodzone surfaces, including the ice machine and bin or dispenser. Clean the following ice machine surfaces carefully with a nylon brush or cloth: side walls, base (area above the trough), evaporator plastic pieces (top, bottom, sides), and the bin or dispenser.
- Rinse: Make sure to rinse all areas with clean water. This will help remove chemicals to prevent ice from becoming contaminated.
How to Clean an Ice Maker’s Exterior
When cleaning your ice maker, pay attention not just to the machine itself, but also to the space around it. Failure to keep your ice machine’s immediate surroundings clean can cause dirt and oil to accumulate faster, contributing to an uncomfortable operating environment. We’ve provided instructions for cleaning the exterior of your business ice machine below.
- Concentrate on your immediate surroundings: As needed, clean the area around the ice maker. This helps to guarantee that your ice maker runs cleanly and effectively.
- Use the proper cleaning supplies: To eliminate dust and grime from the outside of the ice maker, wipe it down with a moist cloth that has been washed in water. Use an abrasive pad or brush at all times.
- If any grease remains after cleaning, use a moist cloth washed in a mild dish soap and water solution to remove it. For limits, consult the owner’s handbook for your equipment. On exterior panels and plastic trim, avoid using chlorinated, citrus-based, or abrasive cleansers.
How to Sanitize an Ice Machine
Plan to clean and sanitize your interior operational system at least once every six months, and more frequently in hard water locations. If you detect any of the following, run a cleaning cycle more frequently:
- The machine takes a long time to discharge and/or collect ice.
- The ice yield is modest.
- Your ice cubes are hazy or soft.
Cleaning Cycle: Your cubes are smaller than normal.
- Turn off the machine and let the ice melt from the evaporator.
- Take off the access covers.
- Turn on the CLEAN/WASH cycle if it is available.
- Allow water to fill the trough and run over the evaporator.
- Fill the trough with adequately diluted Ice Machine Cleaner.
- Allow the machine to complete the cleaning cycle.
- Turn off the machine.
- Remove and clean internal parts as needed (as directed by the manufacturer); severely scaled parts may require soaking in a diluted cleaning solution.
- Clean water should be used to rinse all components and regions.
The cycle of Sanitation:
- Turn on the CLEAN/WASH cycle if it is available.
- Allow water to fill the trough and run over the evaporator.
- Fill the trough with a sufficiently diluted sanitizing solution. Allow the machine to complete the sanitizing cycle.
- Turn off the machine.
- Sanitize any removed pieces and let them air dry; do not rinse.
- Replace any missing components.
- Access covers should be replaced.
- Start the machine.
- Remember that any ice formed during the preceding cleaning and sanitizing cycles, as well as the first batch produced after cleaning, must be removed.
Why Should You Clean Your Ice Maker?
Ice is classified as a food by the FDA, which means it must be handled and cared for in the same way as other food products. Any portion of your ice maker that comes into touch with water might develop scale, slime, or mold, contaminating your ice and even harming your clients.
How Frequently Should You Clean Your Ice Maker?
For effective functioning, your ice maker should be cleaned and sanitized at least once every six months. Cleaning must first be performed to remove lime, scale, and mineral deposits, followed by sanitizing to disinfect the unit and remove algae and slime.
Why You Should Clean Your Ice Machine Frequently
- Avoid scaling on evaporator plates.
- Prevent heat transmission from being hampered.
- Reduce harvest times to help your equipment maintain full capacity and avoid costly repairs
Cleaning tips for Ice Machines
If you’ve never cleaned a kitchen appliance before, you might be at a loss on how to do it properly. Below are some fundamental guidelines to keep in mind when cleaning your ice maker.
- Use the appropriate cleaning products: Some machine manufacturers mandate the use of particular or certified cleaning and sanitizing solutions.
- Follow these steps: When cleaning your ice maker, it is critical that you follow the instructions in the handbook. The methods outlined above are broad principles that apply to the majority of machines.
- Maintain chemical separation: Do not combine the cleaning and sanitizer solutions for safety concerns. This may cause a potentially harmful chemical reaction.
- Wear protective equipment: When handling cleaning and sanitizing solutions, wear rubber gloves and protective safety eyewear.
- Check the water quality: If your equipment is requiring more and more maintenance, check the water quality in your organization. Water treatment or a replacement water cartridge may be required.
- When the water tank is empty during cleaning, do not leave the control switch in the service position for a lengthy amount of time. This might cause the water pump to fail.
- Understand your equipment: Nugget and flake machines often have more moving components that need more care.
Cleaning and sanitizing your ice machine will allow you to keep your device running efficiently, avoid increasing energy expenses, and produce clean, safe ice that is ready to use. Remember to clean and disinfect your ice machine at least once every six months, and consult your ice machine’s handbook for any particular recommendations.