The Photos program on the Mac may consume a lot of storage space—actually, it’s the database of photographs that you’ve imported into Photos that consumes space, not the software itself. As a result, deleting photographs from the Photos app is a logical approach to free up storage space.
Assume you erased some photographs in Photos and now need to recover them. And what if you uploaded some new photographs after removing the old ones? So you want to recover the lost photographs while still preserving the newly inserted ones. Is it possible?
Yes, although it takes some dexterity. You will also want an external device with sufficient storage space to restore your full Photos Library.
If you’ve been performing Time Machine backups, that may be useful. Here’s the main issue: Time Machine deletes older photos as it creates new ones. Files removed from your Mac are only kept for the duration of the most recent snapshot that contains them.
How to Restore a Single Photo from Time Machine
Here’s how to repair an complete Photos Library.
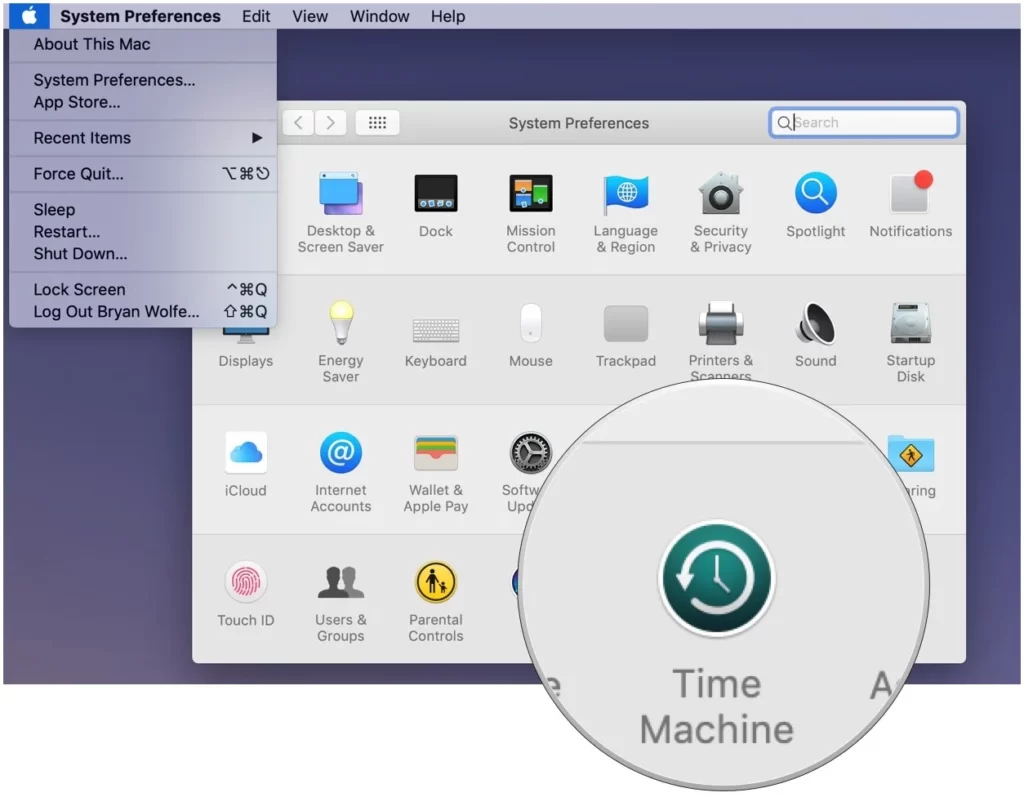
- Launch Time Machine, which is in your Applications folder. If Time Machine seems in your menu bar, choose its icon and click on on Enter Time Machine.
- Navigate to your domestic directory’s Pictures folder.
- Navigate lower back in time to when you understand the Photos Library used to be at the nation you need.
- Control-click the Photos Library to select Restore “Photos Library,” and then choose a vacation spot different than the place the cutting-edge Photos Library lives.
- Click Restore.
- When the repair is complete, maintain down the Option key and launch Photos.
- When prompted, click on Other Library and pick out the restored Photos Library.
You can now pick out and export objects from that restored library, and then cease and relaunch Photos with the Option key held to pick your startup library, and import these images.
Another choice after restoring is to as a substitute use PowerPhotos ($30), which lets you merge Photos libraries. In this case, I endorse stripping all the pictures from the older library that you don’t prefer so you can merge the slimmed-down library with your present one-you don’t lose metadata, authentic snap shots and modifications, and different records and adjustments that way.
- Hold down the Option key and launch Photos.
- Click Other Library and pick out your restored library.
- Delete the whole lot you don’t choose to merge with the new library.
- Quit Photos.
- Launch PowerPhotos and use its alternative to merge two libraries: your now reduced-sized historic library and the present day lively Photos Library.
Another method for the future is to keep separate Photo Library programs if you don’t have sufficient storage to hold the entirety in a single library, and choose to be certain you don’t lose photographs or movies you would in any other case have to delete.
Bonus tips: How to Backup Photos and Photos Library
The necessity of backing up your pertinent images/library cannot be overstated; here are three methods for backing up your photos and photo library.
iCloud Photo Backup
When you save photographs to iCloud, you may access them from your Mac, PC, iPad, or iPhone.
1. To use iCloud for backup, sign in with your Apple ID and enable iCloud Photos.
2. In the Photos app, go to Photos, then Preferences, then finally iCloud.
3. Look into iCloud Photos.
Use Time Machine to backup your photos and library.
1. Connect an external hard drive, such as a USB or flash drive, to your Mac.
2. If a box appears asking if you want to utilize the disk to back up with Time Machine, select Use as Backup Disk.
When you enable Time Machine, it will automatically backup your data.
Save Photos to an External Hard Drive
This is simple to accomplish by manually transferring the photographs and photo library to an external hard disk. However, you must often update it because it will not have the most recent photographs.
Conclusion
Photos are essential to us because they contain cherished memories; nevertheless, they might become lost for a variety of reasons. If you are conscientious about backing up your photographs/library, it is simple to recover photos from Time Machine. However, if you are having trouble retrieving your photographs/library as a consequence of your inability to build a backup, the usage of iMyFone AnyRecover for Mac program will be your greatest rescue to swiftly recover deleted/lost images.