Ready. It’s time to learn how to use a sewing machine. Sewing by machine is not difficult, but having the appropriate fundamentals in place will make all the difference in your trip, making it simple and successful.
HOW TO USE A SEWING MACHINE
How can you get started learning how to use a sewing machine? When you sew, you start with…a sewing machine!
Whether you bought a new one or great aunt Bessie handed you her old one, you must grasp and comprehend the fundamental language of your ‘new’ computer.
As a first-time machine sewer, you should be familiar with all of the machine’s components, from the power switch to the presser foot. Take the time to go through each thing on the machine that is mentioned in the handbook. Look for these basic points. Some may appear apparent but going over the list before you begin sewing will help your journey go more smoothly.
Before Using a Sewing Machine
Here are some parts to identify.
- On/off swap – Start by way of understanding the place the computing device is switched on and off. This is usually on the facet of the machine.
- Bulb – The mild bulb in the needle area. Try it out. If your mild is now not vivid sufficient you might also want to pass your computing device nearer to a window for some extra herbal light.
- Pedal – The foot pedal that operates the machine…your accelerator!
- The pace regulator so that you don’t ruin the pace limit. Some machines will have a swap on the foot permitting you to pick between excessive and low speeds.
- Stitches – Stitch size and width buttons along with ornamental stitches and zigzag. Many more cost-effective novice stitching machines will have set stitches and lengths whereas extra luxurious machines will enable you to set size and width independently. This includes the buttonhole sew settings
- Tension wheels – commonly at the front or pinnacle of the machine. These are necessary for getting high-quality even stitching with no loops.
- Presser the foot and the plate with the sewing guides.
- Needle and small screw that holds the needle in place. You will want to be aware of the place this is to exchange needles.
- Bobbin – The lid that opens to expose the bobbin case and the bobbin itself.
- Bobbin anxiety screw -These are commonly discovered on the bobbin case of the front loading machines.
- Oiling – And don’t forget about to seem for the marked oiling factors and make positive you have the right oil for your machine. Some more moderen machines are sealed devices and do not want oiling so double test this earlier than you begin squirting oil everywhere.
HOW TO THREAD A SEWING MACHINE
THREADING ON THE TOP
Begin by inspecting the top threading and following your instructions as you trace the stages the thread takes. The thread will go from the top of the machine, where the spool is located, all the way down to the bottom, where it will meet the needle.
Until they reach the needle, most machines take the same course through hooks and tension wheels. The thread should enter the needle from the front and pull through neatly with a touch of tension but not too tight.
THREADING ON THE LOWER
The bobbin is attached to the lower threads and tension. Check your handbook thoroughly because various machines have different bobbins and casings. The bobbin may be placed into the machine from either the top of the front.
Top loading bobbins are loaded directly into a casing (seen on the right) that is attached to the machine. Front-loading bobbins are placed in a case (seen on the left) before being inserted into the machine.
Winding the bobbin is a vital aspect of the procedure, so make sure you understand how to wind a bobbin as well.
Typically, this is accomplished by wrapping your main thread around a thread guide and over to the bobbin winder on the spool pin. To begin, all bobbins will have a hole on the top through which you may enter the thread.
Start winding by moving the bobbin winder across! Some machines will also require you to disconnect the flywheel while winding to prevent the needle from moving up and down.
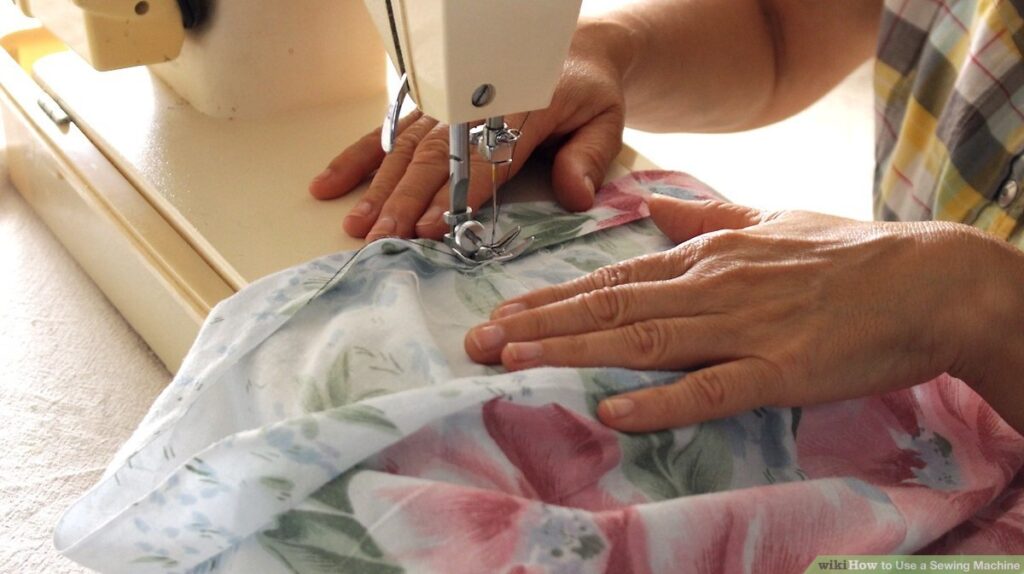
HOW TO STITCH A SEWING MACHINE
Step 1: Add a clean needle to your sewing machine
For novices, it’s advocated that you use a Universal Needle sized 12/80 for your first challenge or two. I ONLY propose the Schmetz manufacturer due to the fact most machines are calibrated to use this needle. Plus they are very durable. Learn extra about stitching desktop needles here.
All stitching laptop needles are designed the identical way (but they all aren’t equal). They are rounded in the front and flat in the back.
Loosen the Needle Clamp and insert a clean needle as excessive as it will go into the machine. Tighten the Needle Clamp. Note: The needle will solely match into the opening in one path – with the flat aspect going through back.
Step 2: Thread the sewing machine
- Most machines are threaded in essentially the equal way. For the right way to thread your precise machine, refer to your manual.
- Sewing machines will comply with the identical music for threading. Your thread will come off of the Thread Spool (which can both be vertical or horizontal) and will go via the first Thread Guide, the Tension Disk or Guide, and the Thread Take-up Guide. Note: On some machines the Tension Guide is now not truly noticeable. It will be earlier than the Thread Take-up Guide. If you want extra instructions, refer to your person manual.
- The thread desires to go thru some kind of Needle Guide earlier than eventually going into the eye of the needle, the front to back. Be positive to snip off the stop of the thread for a smooth reduce earlier than making an attempt to thread the needle.
- From there, put the thread underneath the presser foot and pull it in the direction of the again of machine. This prevents tangled threads when taking your first few stitches.
- Note: Some machines will have a computerized or semi-automatic needle threader. Refer to your guide for directions.
Step 3: The Bobbin of the Sewing Machine
Before you insert a bobbin into your computing device you will want to wind a bobbin. This will take vicinity to the pinnacle of your machine. Since machines wind bobbins differently, you will want to refer to your consumer guide and cautiously comply with the instructions on how to wind a bobbin.
Your laptop will additionally take a unique kind of bobbin. It would possibly be steel or plastic.
Be certain the bobbin winds evenly and the thread isn’t too loose. Don’t fear about over filling the bobbin; your computer will mechanically end when the it’s full.
Top or Front Loading Bobbins
Bobbins will both load from the pinnacle of the machine, close to the needle or from the the front of the machine, underneath the needle.
The ideal technique for inserting your bobbin will rely upon your unique computing device company and model. Consult your machine’s guide and cautiously observe the instructions for loading the bobbin.
Every time you alternate your bobbin it is a top concept to take a small brush and eliminate any lint construct up. This is a exact dependancy to undertake and will hold your desktop going for walks easily for a lengthy time.
Step 4: Feed Dogs and Presser Feet
Occasionally a sample might also teach you to “lower the feed dogs” earlier than persevering with a step.
The feed puppies are the metallic tooth below the presser foot. They go when you sew and gently grip the material backside in order to bypass it thru the machine.
Feed puppies will continue to be raised for most sewing, however, they can be decreased for features such as free action quilting.
There need to be a button or dial on the proper of your laptop for reducing the feed dogs. If no longer simply marked, take a look at your machine’s guide.
A stitching computing device will come with a range of toes which all have special uses. The most frequent foot is the Universal Foot or ZigZag Foot. This foot presses material down onto the feed puppies and throat plate in order to feed the material via the machine.
This foot will accommodate most novice projects. For greater records on one of a kind feet, go to my Sewing Machine Feet Guide.
Step 5: Throat Plate and Seam Allowance Markings
The throat plate is a metallic plate that sits under the presser foot and normally has seam allowance markings.
The throat plate will have an opening for the needle to omit through. This can fluctuate relying on your machine, however comprises unique needle positions. It will every so often want to be eliminated to easy lint from your machine.
The seam allowance markings are meant as a tenet for stitching seams in various widths.
Learn More
Your new sewing machine stitching talents will bring you much joy. Sewing is a fantastically creative and useful pastime, and learning how to use a sewing machine is the first step of an incredible journey. You may not be ready to race in Formula One, but with your foot on the pedal of your sewing machine, you may race along the road of practical and creative sewing and enjoy every step of the way!
Have you ever been stuck in the following problems with sewing machines? Read & Learn more together!
- Why My Sewing Machine Not Making Straight Stitches – How to Adjust
- Why My Sewing Machine Skipping Stitches – How to Fix
- How to Change Sewing Machine Needle With Simple Methods
- How To Clean Your Sewing Machine With Simple Steps
- Why Does My Sewing Machine Keep Jamming – How To Solve
- What is a Serger Sewing Machine – Everything You Should Know
- How To Hem Pants By Sewing Machine In The Easy Way
- How to Use Brother Sewing Machine – Beginner Guide 2022
- How To Thread A Sewing Machine: Step-By-Step Instruction