One of the first abilities to master if you’re a beginner after learning how to set up your sewing machine is knowing how to put a needle in a sewing machine.
Here is how changing a sewing machine needle is advised by Singer, Brother, and Janome manuals.
This article still applies if your device is made by a different manufacturer. The process is the same for most brands.
When to Change a Sewing Machine Needle
When a sewing machine’s needle needs to be changed, there are several signs.
It goes without saying that you should insert a new needle if your current one is broken, bent, or dull.
Changing your sewing machine needle may also be necessary if you’re significantly altering the thread weight or type of fabric (for example, switching from knit to woven fabric).
Needles should be changed after each project, according to some sewers, but I change mine less frequently. But an outdated needle can ruin your stitching!
It might be time to switch to a new needle if you’re having trouble diagnosing sewing machine problems.
Here are a few problems that, when troubleshooting, might warrant a new sewing machine needle.
- Threads breaking while sewing
- Large punctures in the fabric
- Popping sound when puncturing the fabric (caused by a dull or damaged tip)
- Skipped or uneven stitches
I also recently wrote a post about the various sizes and types of sewing machine needles, which provides some additional guidance on choosing needles.
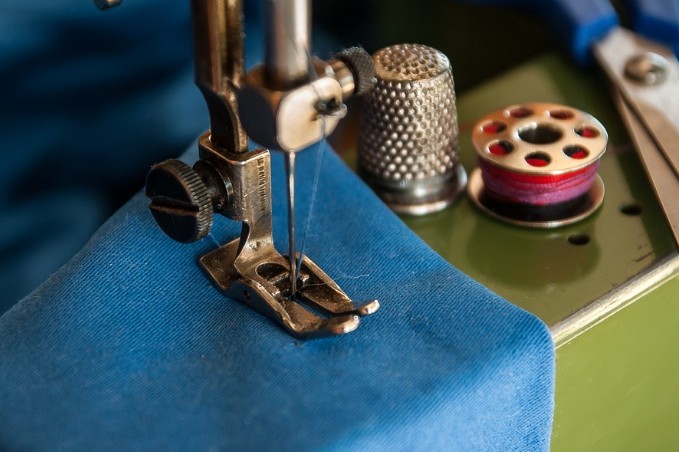
How to Change a Sewing Machine Needle
1. Remove the Old Sewing Machine Needle.
To ensure your safety, turn off your sewing machine first. To get better lighting and take better pictures, I turned on my sewing machines while taking the pictures.
To remove the sewing machine needle, you first need to loosen the needle clamp screw. The actual needle is held in place by the needle clamp. Right beside this needle clamp there should be a tiny screw.
You can loosen the screw in different ways depending on your sewing machine.
- On my Singer heavy-duty sewing machine, the needle clamp screw is easily twisted by hand. To loosen the screw, unscrew it either clockwise or in your direction. In case the needle falls out, hold it in place with your other hand.
- On my Brother sewing machine, the needle clamp screw is not as easily unscrewed by hand if it is tightened.
Here, I loosen the needle by turning the screw counterclockwise in my direction using a flat-head screwdriver.
The needle clamp screw doesn’t need to be significantly loosened. Simply enough to make the needle loose.
As soon as the needle begins to emerge from the clamp, grab it with your thumb and pointer finger and pull it away at an angle.
To give your fingers more room to pull the needle out, it might be simpler to remove the presser foot first.
A quick diagram demonstrating the round and flat sides of a needle is provided below.
As you take the needle out, take note of whether the flat side of the needle shank (top portion of the needle) is facing the front or the back. The flat portion of the needle is facing the machine’s back on every sewing machine I’ve ever used.
2. Put the Needle in the Sewing Machine.
I’ll walk you through each of the three methods for replacing a sewing machine needle.
A. Insert the Needle Using Your Fingers
The needle can first be changed by angling it up and into the screw clamp with the help of your fingers.
Make sure you’ve pushed it up as far as it will go and the flat part of the needle is facing the back.
After that, turn the screw clockwise to tighten it. As tightly as you can, make sure it is. A shaky needle will result in a variety of issues!
B. Insert Using a Clearance Plate
The second way is to use what is called a clearance plate to insert the needle. My Singer 4452 sewing machine included a handy device like this.
Place the needle in the clearance plate first. Looking at the plate, it is obvious which side is for the round side and which is for the flat side. It ought to firmly fit inside the plate.
Move the plate into the sewing space with the clearance plate facing the right way and the top of the needle inserted into the needle clamp. How to do that is shown in the image above.
Push the needle all the way up once it is in the clamp. When the needle is inserted correctly, you won’t see much of the top sticking out.
The needle clamp screw should be tightened clockwise with the needle fully inserted in the clamp.
C. Insert With a Dritz Needle Inserter and Threader
You could choose to use a needle inserter and threader from Dritz (or an inserter only from Singer) to help you insert the needle in place of the clearance plate.
You insert the needle into the inserter and use that to push the needle into the needle clamp with these, just like you would with a clearance plate.
If you have a Dritz device, you get extra points because you can also use it to thread your own sewing machine needle!
3. Setting Up to Sew After a Needle Change
Put the presser foot back on if you removed it.
After that, rethread your sewing machine needle. Make sure the thread is inserted through the needle’s eye from front to back.
Next, pull the thread in a backwards direction from underneath the presser foot.
Make sure your needle is positioned correctly so that the automatic needle threader on your sewing machine can pass through the needle’s eye. If not, simply manually thread your sewing machine needle.
Final Notes
The flat side of the needle should be facing toward the back of the machine. Verify that it is fully seated in the needle clamp before firmly tightening the needle clamp screw.
That’s all there is to learning how to change a needle on a Singer or Brother sewing machine. It will become muscle memory after a few repetitions!
Have you ever been stuck in the following problems with sewing machines? Read & Learn more together!
- Why My Sewing Machine Not Making Straight Stitches – How to Adjust
- Why My Sewing Machine Skipping Stitches – How to Fix
- How To Clean Your Sewing Machine With Simple Steps
- Why Does My Sewing Machine Keep Jamming – How To Solve
- What is a Serger Sewing Machine – Everything You Should Know
- How To Hem Pants By Sewing Machine In The Easy Way
- How to Use Brother Sewing Machine – Beginner Guide 2022
- How To Use A Sewing Machine: Step-By-Step Instruction
- How To Thread A Sewing Machine: Step-By-Step Instruction